How to play
Guide · beta v0.3
Craterborn is a loot extraction action game: you go down into a crater, gather loot from monsters and caches, and then have to make it back to an exit with it. Nothing you carry is yours until you extract. This guide describes the rules as they work in the current version of the game — not what we are still planning.
The crater and its four rings
The crater is a round arena split into four rings, from the rim to the centre: T1, T2, T3 and T4. The closer to the centre, the tougher the monsters and the better the odds of rare loot. The rarest, mythic items drop in T4 only.
- T1 is the learning ring. Players cannot attack each other there, and monsters give up the chase quickly.
- T2 opens at character level 2, T3 at level 5 and T4 at level 9. You can go deeper than your level allows, but the ring burns you — you lose health every second, faster the more levels you are missing. A quick dash for one cache can pay off; a longer stay ends in death.
Up to 12 players share one crater. A crater lasts 10 minutes; from the eighth minute the exits go dark one after another, so you need to get your loot out in time. When many people are playing, the game puts you in a crater with players of a similar level (1–4, 5–8, and 9 and up). When few are playing, everyone goes into the same crater so you actually meet.
Extraction and the loot rule
The exits are four extraction pillars on the outer rim of the crater, in T1. The compass in the corner and the arrows along the screen edges show which way they are and how far. At a pillar, hold the action key (E on a keyboard): extraction takes 5 seconds, and any hit interrupts it. Once you extract, the items in your backpack go to your stash in town.
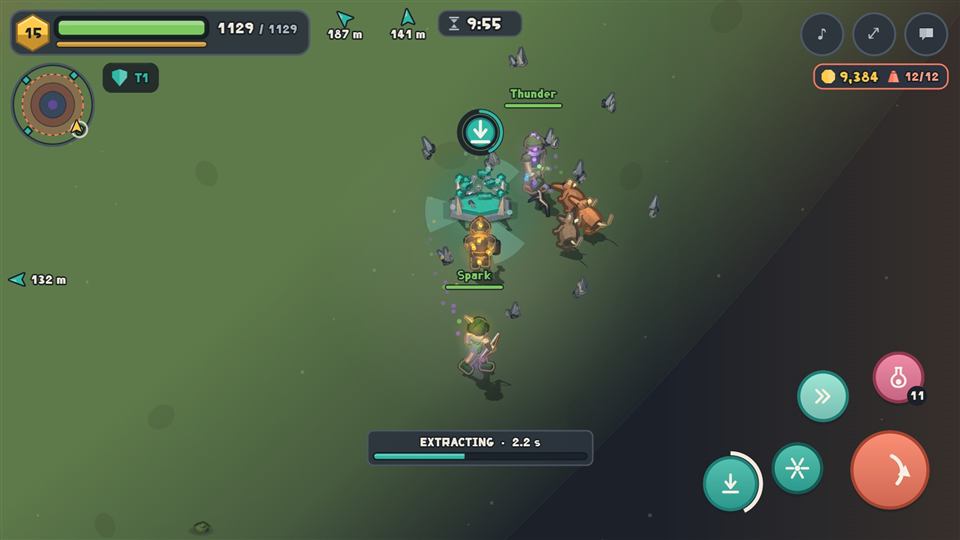
There is one rule: you own nothing until you bring it back. Your backpack holds 12 items. If your character dies, the whole backpack stays in the crater in a cairn, and anyone can take it straight away — you too, if you make it back in time. The gear your character is wearing stays with it; only what it was carrying is lost. If your connection drops, your character waits for you in the crater for 30 seconds, and it is not invulnerable meanwhile.
Health does not regenerate by itself. Potions heal: you have three charges per run, and each restores over a third of your health. A dodge saves you too — a short leap with a moment of invulnerability, available every 9 seconds.
Caches, the crate and events
Caches are scattered around the crater. A plain cache takes a second and a half to open, a sealed one five seconds, and a reliquary in T3 and T4 twelve. A longer opening means better loot, but also a longer moment without defence. Once per crater the town drops a crate into T2 or T3; whoever opens it first keeps it. About every other crater gets one event, announced when you enter: Lantern Tide (more items drop for 90 seconds) or Hunger (monsters from T2 inward are faster, but their loot has a better chance of rarity).
Classes: Warden and Skirmisher
You pick a class once, when you create your character.
- The Warden fights up close. It has more health and armour, strikes in a cone in front of it, and its ability shatters the ground around it. A melee hit briefly slows the target.
- The Skirmisher fights at range. It has less health, deals more damage and fires a bolt; its Volley ability looses a fan of five arrows. Every shot slows the shooter for a moment, so running and shooting at once comes at a price.
A hit in the back deals 35% more damage, from the side 15% more — positioning counts as much as gear. Controls: WASD and the mouse, left button to attack, Space for the ability, Shift to dodge, Q for a potion, E for caches and extraction. On a phone the left half of the screen is the movement stick and the right half holds the action buttons; a gamepad works too.
Elites and their elements
From T2 inward there are elites: three each in T2 and T3, and four in T4. Each one charges its slam with its own element, and a ring on the ground shows where it will land. The Goblin Chief in T2 tears up turf, the Blightling in T3 splits the ground with cracks of magma, and the Snow Tiger in T4 pounces from several metres away and ploughs the ice with its claws. You cannot simply walk out of an elite slam — you need a well-timed dodge or a potion.
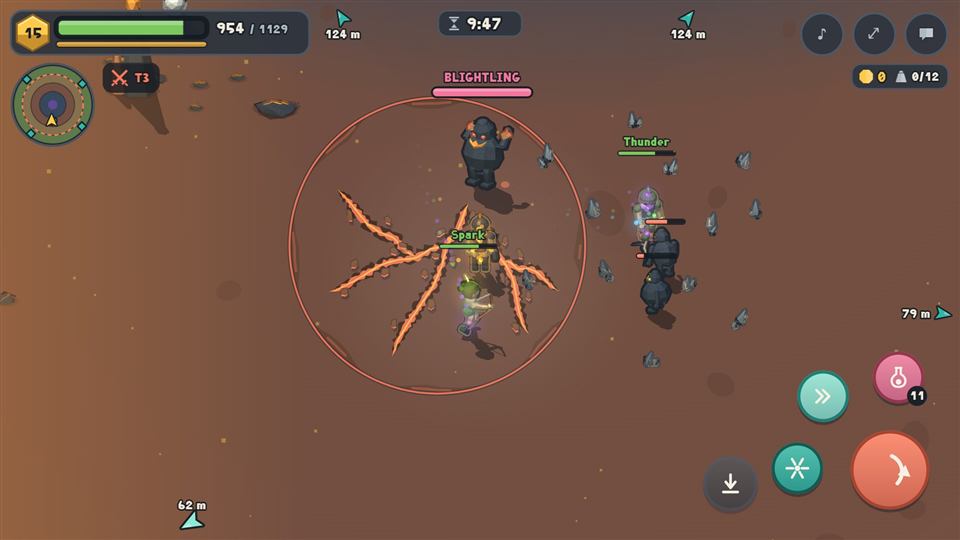
On average one elite in three drops a crafting material: Packed Turf (T2), Fervent Coal (T3) and Everfrost (T4). Without them you cannot upgrade gear beyond +2.
The Mossy Golem
In T3, in a clearing of its own, lives the Mossy Golem boss. The fight has three phases: first the golem slams roots across a wide ring, then it hides its core under stone and opens it only for a moment, and finally it summons helpers. Anyone who does not get out of the slam is rooted to the ground for half a second. A defeated golem leaves a Golem Core and a vault where it fell. Opening the vault takes 8 seconds in the open, in front of everyone who fought nearby. The golem returns after a minute and a half.
The shaft and the Hunter in the meteor chamber
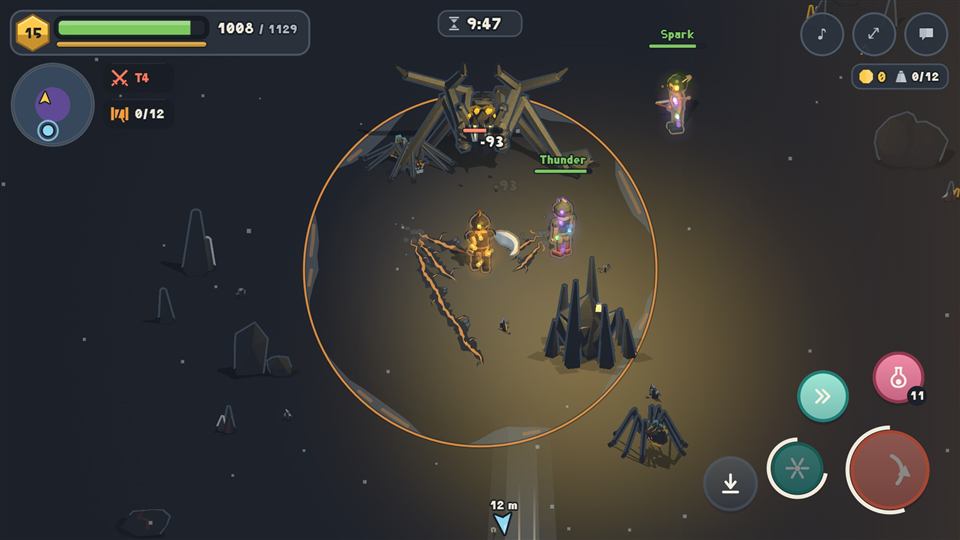
At the very centre of the crater, in T4, there is a shaft with a winch and a lantern. It leads to the meteor chamber, home to the Hunter — a huge spider — and five smaller arachnids. The shaft is open until the fifth minute of the crater, then ice seals it; the way back up stays open until the end. There is no extraction from the chamber: you have to carry your loot up the shaft and through all four rings to a pillar on the rim.
Uniques and the Workshop
The Hunter leaves a Hunter's Thread, and sometimes a unique for your class — your first kill guarantees one. There are ten uniques, five per class, and each has its own trait, such as a dodge that recharges faster or a shot that hits harder after a moment of silence. Three uniques worn at once give +10% damage to monsters and bosses (not to players), and the full set gives only the title "Hunter's Hunter", with no stats. In the Workshop (in the Stash tab) you can weave a missing piece from 12 Threads and 50,000 Marks. Unwanted loot can be sold for Marks or salvaged for materials, and a good item can be upgraded up to +5 or have one of its stats rerolled.
Parties
A party has up to three people. You invite friends in town, or open your party to strangers and find one on the list. Party members cannot hurt each other, have their own chat channel and go down into the crater together once everyone has marked themselves ready. You can only change parties in town.
Town
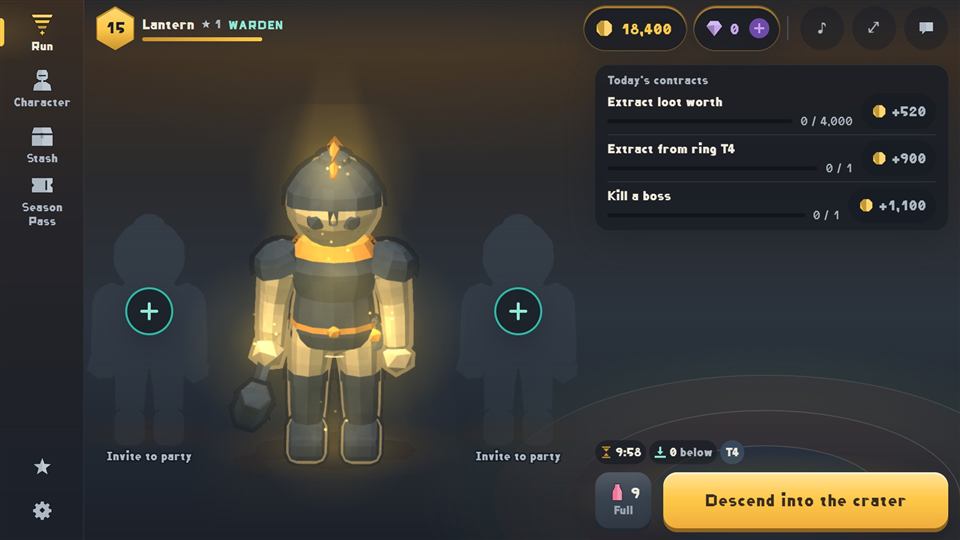
Between runs you are in town. The tabs on the left are Run, Character, Stash and Season Pass, with Leaderboard and Settings below. The currency you earn in play is Marks: you get them for selling and salvaging loot and for daily contracts — three tasks shared by all players, changing at midnight Polish time. Marks buy extra potion charges, upgrade your gear and expand the town: a bigger stash, an extra potion per run and a shorter extraction. Town upgrades are never lost, not even when you die in the crater.
The Season Pass and gems
Gems are the second currency. You earn them in play — during the Gem Rush (every day from 18:00 to 21:00 Polish time, each elite you defeat drops a gem and the boss drops two; they count once you extract), for the weekly leaderboard podium, and for watching an ad to the end when ads are available — or you buy them. Gems are spent on one thing only: the Season Pass, 30 levels earned with daily contracts, valid for one season, usually a calendar month (the September season runs to the end of October). At levels 5, 10, 15 and 20 the pass gives looks — a companion (the Lantern Moth), an outfit for your class, a title and a salute over the exit when you extract — and the other levels give 450 gems back in total, half the price. Until 31 October 2026 they also give Marks and crafting materials; from the November season, gems only. Gems cannot buy gear or stats. Without the pass, contracts work the same and pay Marks.